
Appearance
forms4health Integration
This guide will cover the steps needed to create an endpoint for a simple form, then use some data from that form to send an email to the user. We will assume that you have already created the form in forms4health (See the forms4health documentation if you are unsure how to do this.)
Pre-requisites
For the purposes of this guide, we will be using this form.. It has been setup so that the following control names are used:
first-namelast-nameemail
It has been configured to point to our endpoint already.
Setting up the endpoint
Definition
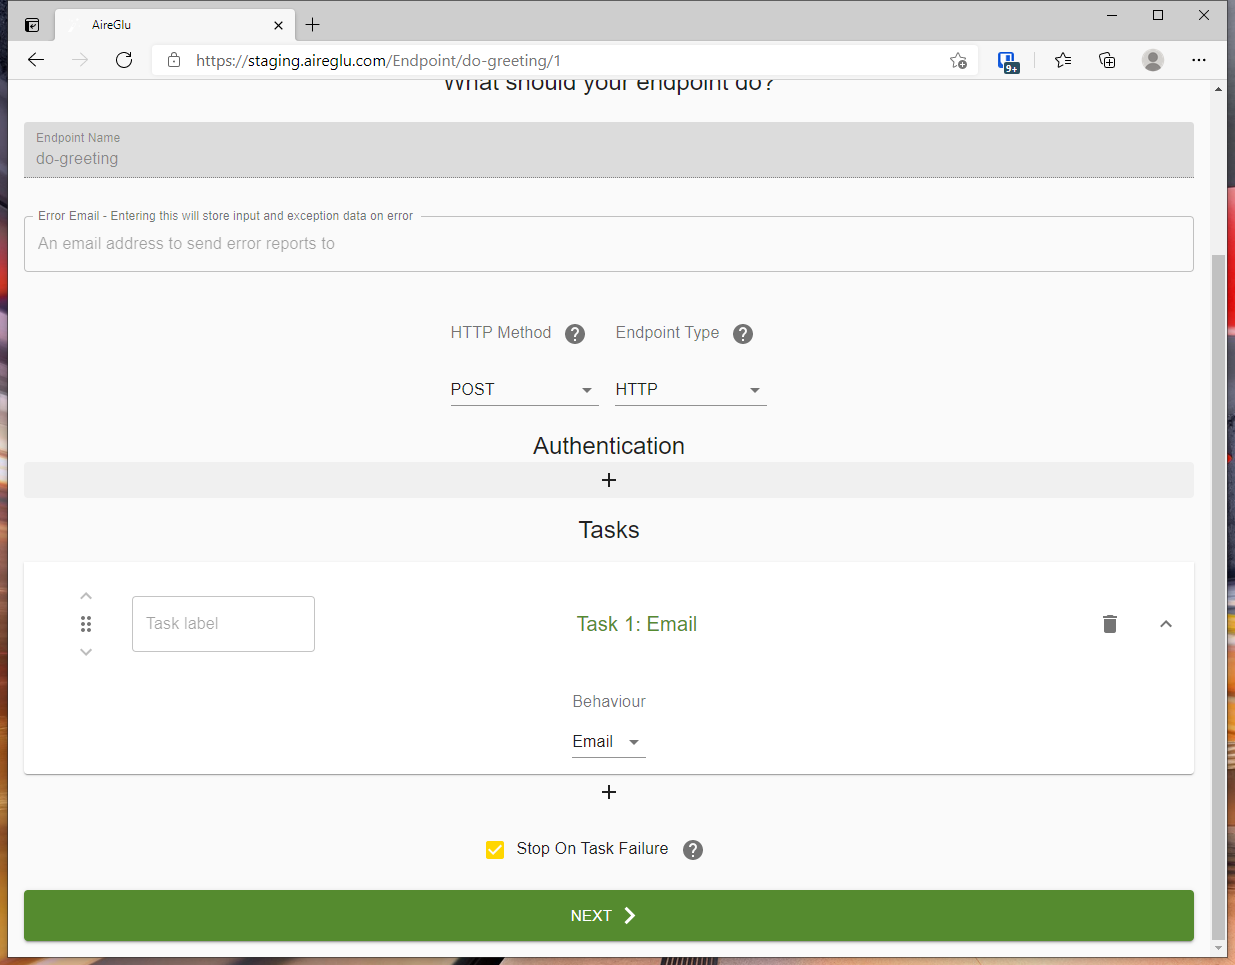 Head over to the Endpoints page using the top menu, and add a new endpoint.
The first step is to define our endpoint name and tasks it will perform. We’ll go through and add details to these tasks later. The Endpoint Name is important. This should be descriptive, but not too long because it’s used in the url for the endpoint. Task names should also be descriptive for your reference later. In our case, we’ll use do-greeting as an endpoint name. We also create a single Email type task called Send an Email.
We'll also leave the other settings as defaults: HTTP Method is POST, Endpoint Type is HTTP, no authentication, and Stop on Failure on.
Hit the Next button at the bottom to continue.
Input data
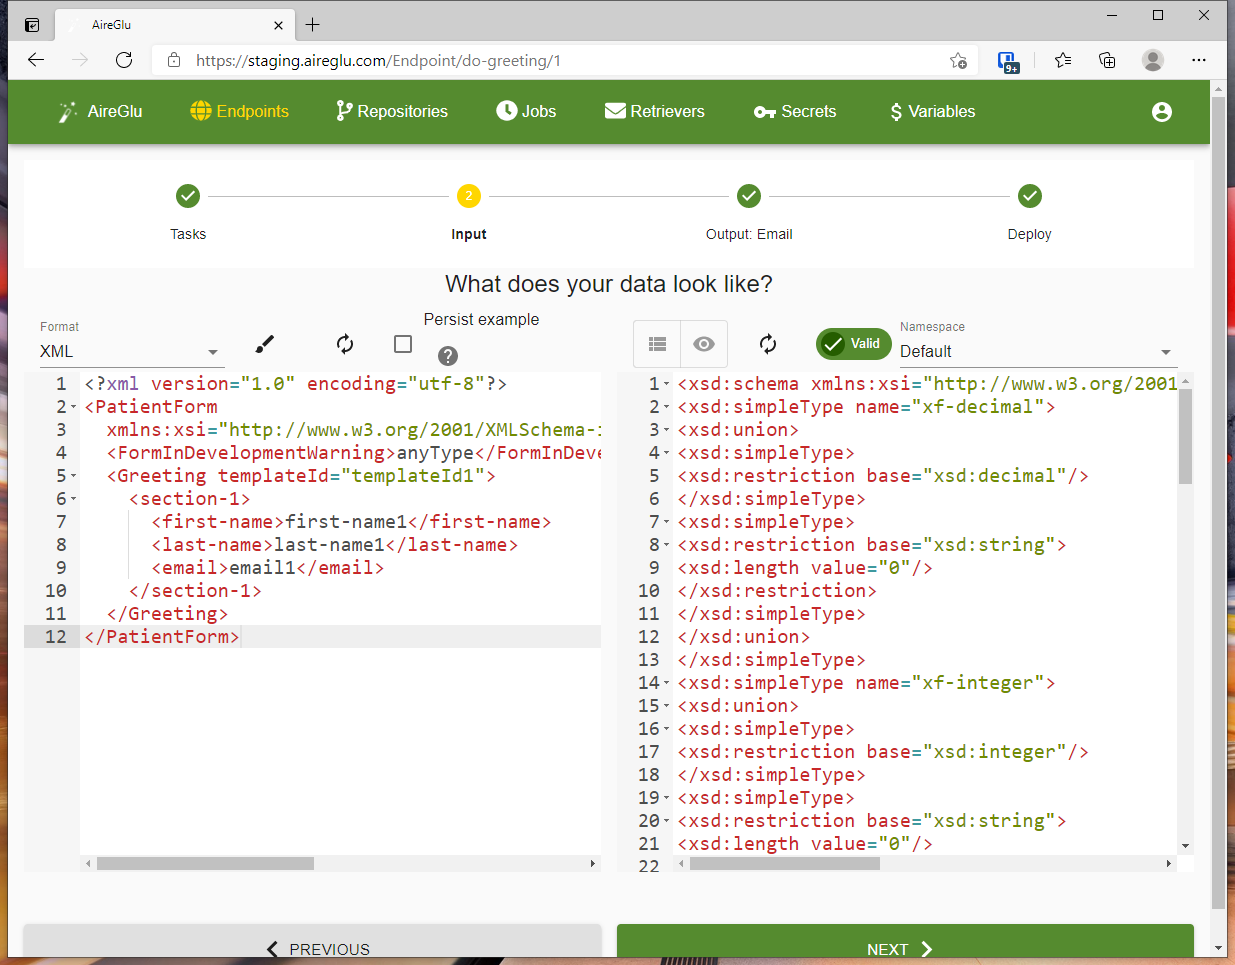
Our input data can start to get complex when we're dealing with forms. The best way to define this is by providing the form schema. This can be found at a url that looks like: https://[environment]-forms.forms4health.com/api/formschema/[form-name]/[form-version]. Our form is in the sandbox environment, has a name of greeting, and a version of 1, therefore our schema is found here: https://sandbox-forms.forms4health.com/api/formschema/greeting/1
Before we do anything else, we should change the Format to XML. Then select the View tab of the context panel (the Eye icon on the right hand side). Replace its contents with the schema from our link. You may need to refresh the data on the left hand side so it matches our new schema.
Creating the email
We'll keep our email simple, but it will use data from our form for the sender, subject, and content. We'll ignore attachments and custom SMTP as it's beyond the scope of this guide.
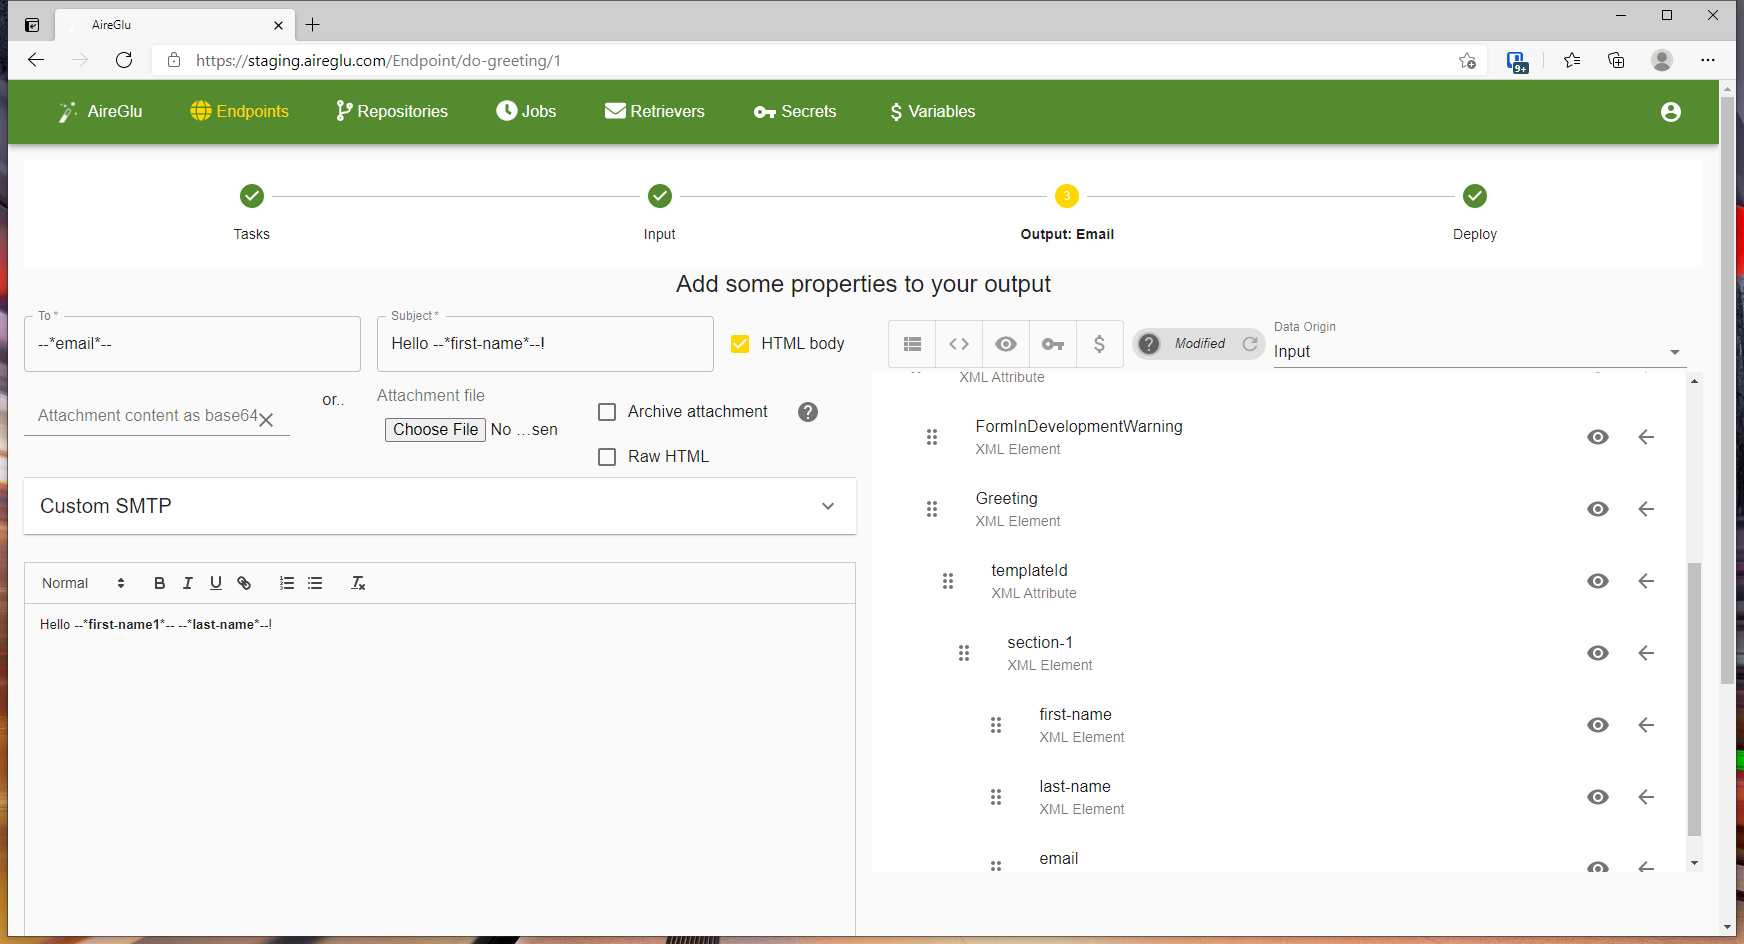
Make sure you have the Data tab open in the context panel (list icon). Data origin should be Input by default, as we don't have any other tasks that provide us with data to use. Scroll down, and you should find the fields we're interested in. Click into the To field, and then click the arrow next to email in the context panel.
note: Clicking the arrow to insert this does more than just add the text --*email*-- to the field. It also links this to the data itself. By clicking in the middle of this text, you should see a new link icon appear. You can click this to see details of the underlying XPath that's used to link this to data.
Now, add a subject of Hello --*first-name*--! (again, using the context panel to insert first-name), and a content of Hello --*first-name*-- --*last-name*--!
Click Next when you're ready and Save.
Trying it out
Now that we've created our endpoint, we can submit our form and see our endpoint in action! Open the form and give it a go. Once you submit the form, you should receive an email from AireGlu saying Hi!